
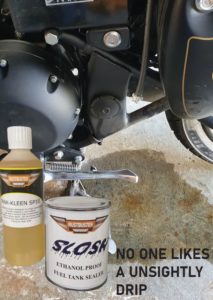
So, you’ve noticed a drip!
You’ve got a weeping or more seriously leaking petrol tank!
What can you do? Replace or seal?
Fuel tank sealer now provide a realistic option to repair and seal the internal surfaces of a fuel tank. Modern fuel contains Ethanol and this chemical can and will promote corrosion over time
Ethanol can contribute to rust formation in a fuel tank due to several reasons:
- Hygroscopic Nature: Ethanol has hygroscopic properties, meaning it can absorb moisture from the air. When ethanol-blended fuel sits in a tank, it can draw in water vapour from the surrounding environment. This moisture can condense on the inner walls of the fuel tank. The presence of water creates conditions that accelerate the corrosion process, leading to rust formation.
- Chemical Reaction: Ethanol can be corrosive when it comes into contact with certain metals commonly used in fuel tanks, like steel or iron. Ethanol can react with these metals, causing oxidation and accelerating the formation of rust.
- Aggravating Existing Issues: If there are already small areas of corrosion or vulnerable spots in the tank, the introduction of ethanol can worsen these areas, causing them to rust more rapidly due to its corrosive nature.
- Higher Oxygen Content: Ethanol-blended fuels generally contain more oxygen compared to non-ethanol fuels. This higher oxygen content can promote oxidation and corrosion of metals in the tank.
To combat rust caused by ethanol in fuel tanks, manufacturers often recommend using coatings or treatments designed to protect against ethanol’s corrosive effects, as well as ensuring proper maintenance and periodic inspections to prevent and address corrosion issues.
Rustbuster Slosh tank sealer has been available since 1998 and is proven to work.
Slosh is specifically formulated for effectively sealing steel and aluminium fuel tanks used for petrol and diesel. Rigorous tests conducted with ethanol concentrations of up to 85% demonstrate that the coating remains intact, showcasing its robust capability to safeguard against the ethanol present in contemporary fuel blends.
Before commencing the sealing process, it is crucial to eliminate or shield any components that should not be sealed by Slosh. This includes plugs, fuel gauge sender units, breather pipes, filters, and similar parts. When the tank is removed from the vehicle, thoroughly inspect it for holes and any remnants of prior sealants. Should any previous sealant be detected, it must be removed using Rustbuster AS-10.
Slosh effectively seals pinholes with diameters of up to 500 micrometres (approximately 0.5mm) and addresses weeping seams. Larger holes should be repaired externally through welding or by using PC-7 Epoxy Repair Paste. We highly recommend following the subsequent procedure for the comprehensive cleaning and sealing of your tank.”
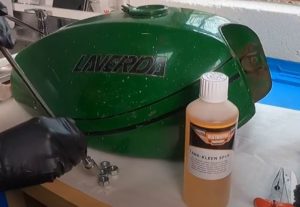
To ensure optimal cleaning of the tank, it is recommended to utilize Rustbuster Tank-Kleen caustic detergent for the thorough removal of grease, dirt, and fuel residues. In case rust is detected within the tank, it is advisable to employ an appropriate rust remover. For specific details, please get in touch with us.
How Do I clean the tank?
- Place temporary bungs in drain holes, sender holes, etc., and introduce a few nuts, washers, or small sharp stones into the tank.
- While wearing protective gloves, pour 500ml of Tank-Kleen into the tank and seal the fuel filler opening.
- Agitate the tank by shaking it side-to-side to dislodge loose surface contaminants. Then, drain the Tank-Kleen along with the nuts/washers or stones. Repeat this process until the tank is thoroughly cleaned. The Tank-Kleen can be reused by filtering out the dirt removed from the tank each time.
- Rinse the tank meticulously with fresh water until all residues and traces of Tank-Kleen are completely removed. A power wash (avoiding high pressure) or shaking the tank can assist in this step.
- Allow the tank to dry completely. The tank must be completely dry before applying Slosh. If feasible, use a compressor to pass air through the tank to expedite the drying process.
To effectively seal the clean and completely dry tank, follow these steps:
- While wearing protective gloves, pour the entire contents of Slosh-marked bottle 1 into the tank.
- Gently move the tank in various directions, ensuring the interior is entirely coated. After coating, allow the tank to rest for twenty minutes. Repeat this process two more times.
- Drain the excess sealer through the drain plug hole back into the empty container. Avoid draining Slosh from the fuel filler opening, as its extended edge inside the tank might hinder complete drainage. It’s crucial to remove excess sealer to prevent potential bubbling reactions during the curing process.
- The excess sealer will cure fully in the container and can be disposed of as dry waste.
- If after two hours the first coat remains tacky, pour the entire contents of Slosh marked bottle 2 into the tank.
- Repeat the process of moving the tank to coat its interior thoroughly. Rest the tank for twenty minutes after each coating, repeating this process twice more.
- Once again, drain the excess sealer through the drain plug hole into the empty container, avoiding draining through the fuel filler opening for complete drainage.
- The waste sealer will cure completely in the container and can be disposed of as dry waste.
The tank can be utilized after 24 hours, although it’s recommended to wait for a period of 5 days for optimal curing.
Sealers are designed to holdback and bind together any loose material whilst providing protection from the ethanol and are relatively easy to use 9if you follow the instructions).


